


TL;DR: Quick Summary
Here are five game-changing upgrades that will transform your laptop:
-
SSD Installation: Replace your old hard drive for lightning-fast boot times
-
RAM Upgrade: Add memory for smooth multitasking and better performance
-
Thermal Paste Refresh: Fix overheating issues that slow down your processor
-
Wi-Fi Card Swap: Get faster internet speeds and better connectivity
-
Battery Replacement: Restore portable power and eliminate swelling issues
Why Upgrade? Benefits Beyond Speed
DIY laptop performance improvements offer more than just faster computing. You're making a smart financial decision that pays dividends beyond immediate performance gains.
First, upgrades extend laptop lifespan significantly. A laptop that might feel obsolete can perform like new hardware for 2-3 additional years. This delayed replacement cycle saves serious money.
Environmental impact matters too. Electronic waste is a growing problem, and keeping your current laptop running reduces demand for new manufacturing. You're being environmentally responsible while saving cash.
Cost comparison makes the case even stronger. A decent new laptop costs 600−1200,whilethesefiveupgradestypicallyrun150-300 total. That's substantial savings for comparable performance improvements.
Pre-Upgrade Checklist
Compatibility Checks
Before ordering parts, verify what your laptop can actually handle. Manufacturer websites often have upgrade guides specific to your model. Search for your laptop's exact model number plus "upgrade guide" or "service manual."
Crucial's Scanner tool provides another excellent resource. This free utility scans your system and recommends compatible memory and storage upgrades. It eliminates guesswork about DDR types, maximum capacity, and form factors.
Essential Tools
Gather these items before starting any work:
-
Precision screwdriver set (Phillips head sizes 00, 0, 1)
-
Anti-static wristband to prevent component damage
-
Thermal paste (Arctic MX-4 or similar)
-
Plastic spudgers for gentle prying
-
Compressed air for cleaning
Backing Up Data
Never skip data backup. Hardware installations can go wrong, and you don't want to lose important files.
Macrium Reflect offers reliable disk cloning for Windows users. It creates exact copies of your drive, making restoration simple if problems arise. Clonezilla provides similar functionality as free, open-source software for more technically inclined users.
Upgrade 1: Swap HDD for an SSD

Why It's #1: Speed Transformation
SSD upgrade laptop modifications deliver the most dramatic performance improvements you'll ever experience. Traditional hard drives with spinning disks are bottlenecks that limit everything your laptop does.
Boot times drop from 60+ seconds to under 15 seconds. Applications launch instantly instead of taking 10-20 seconds. File transfers happen at lightning speed. This single upgrade transforms user experience more than any other modification.
Picking Your SSD: NVMe vs. SATA, Capacity Tips
Modern laptops typically support either SATA or NVMe SSDs. NVMe drives offer faster speeds but cost more. SATA SSDs still provide massive improvements over traditional hard drives at lower prices.
Capacity sweet spot sits around 500GB-1TB for most users. Smaller drives fill up quickly, while larger capacities increase costs without proportional benefits for average users. Calculate your current storage usage and add 25% buffer space.
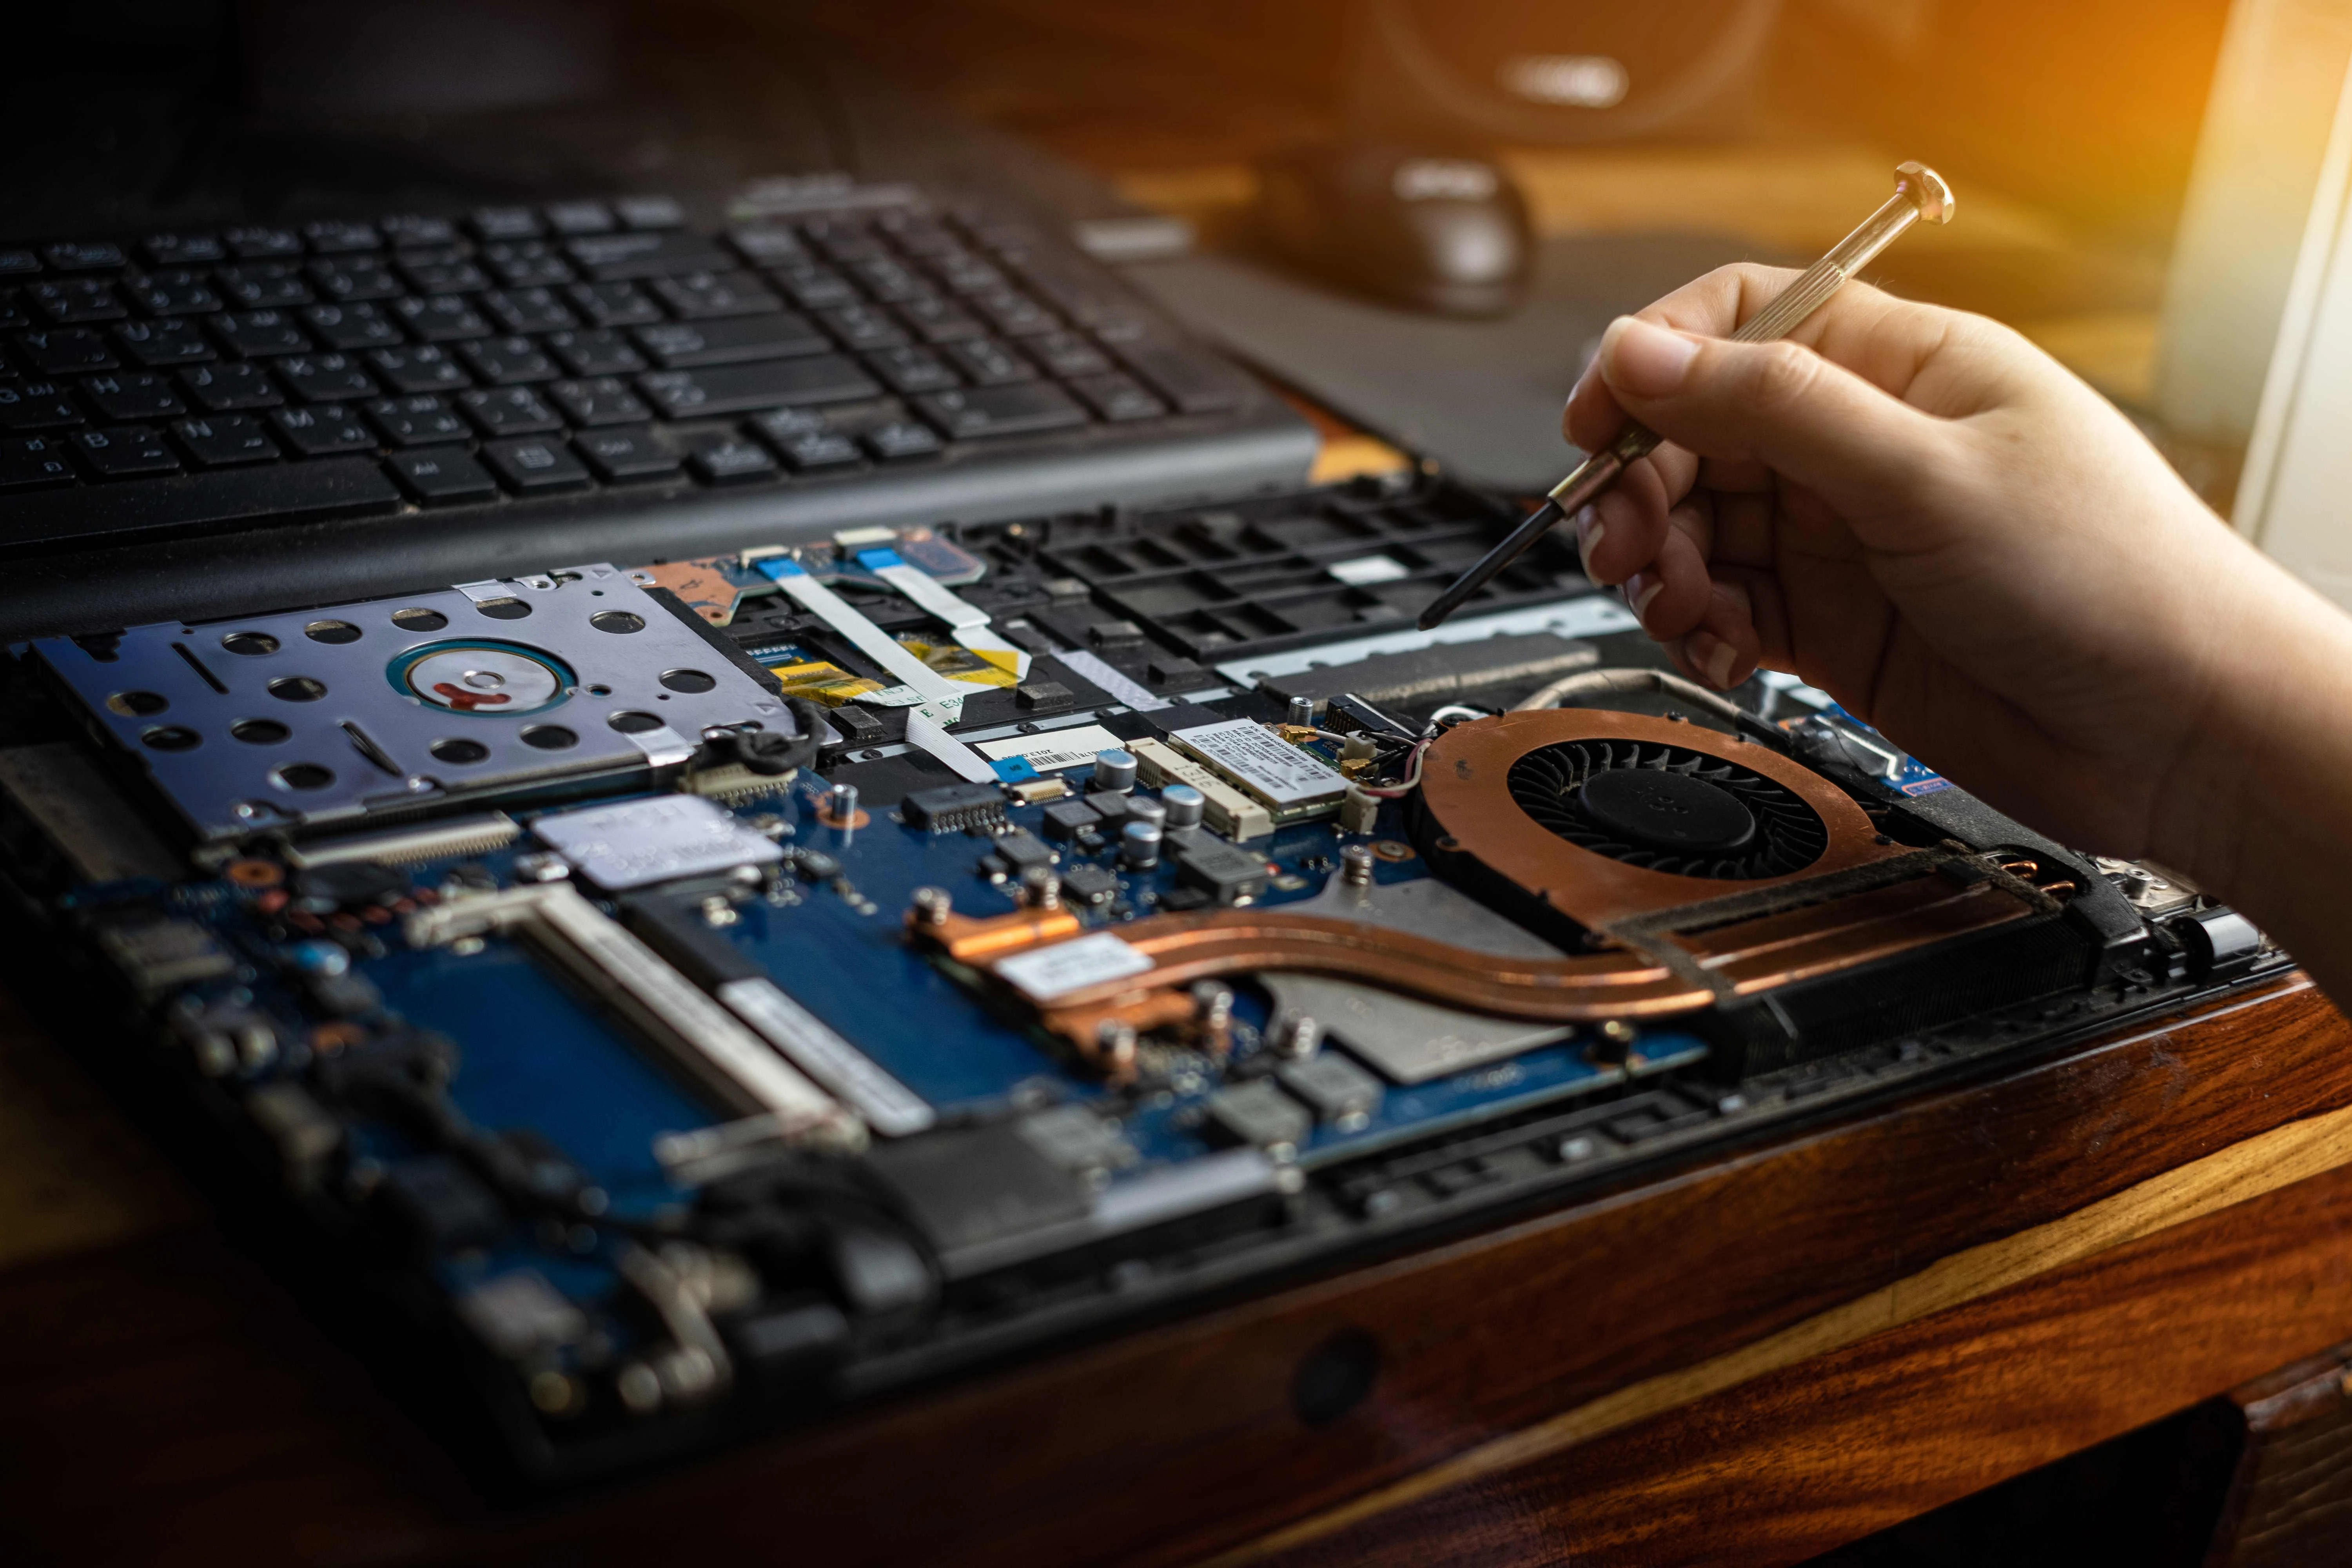
DIY Installation: Cloning and Physical Swap
Install SSD step-by-step process begins with cloning your existing drive. Connect your new SSD via USB adapter and use cloning software to copy everything over. This preserves your operating system, programs, and files.
Physical installation varies by laptop model. Most require removing bottom panels and disconnecting ribbon cables. Take photos before disconnecting anything - they'll help during reassembly. Handle components gently and avoid forcing connections.
Upgrade 2: Increase RAM

How RAM Fixes Lag
RAM upgrade laptop improvements address multitasking bottlenecks directly. When your laptop runs out of available memory, it starts using much slower storage as temporary memory. This causes the sluggish performance you experience with multiple programs open.
Modern browsers are memory hungry. Each tab consumes RAM, and complex websites can use 100-200MB each. Creative applications like photo editors or video software demand even more memory for smooth operation.
Finding Compatible RAM
How much RAM for multitasking depends on your usage patterns. 8GB handles basic computing and light multitasking. 16GB accommodates heavier workloads including photo editing, multiple browser windows, and background applications.
Use CPU-Z to identify your current RAM specifications. This free utility shows DDR type (DDR3, DDR4, DDR5), speed ratings, and available slots. Match these specifications exactly when purchasing new modules.
Step-by-Step Install
RAM installation ranks among the easiest laptop upgrades. Most laptops have accessible memory slots under removable panels.
Power down completely and remove the battery if possible. Locate memory slots and gently spread the retention clips. New modules should slide in at 30-degree angles, then press down until clips engage automatically. Firm pressure is normal, but avoid excessive force.
Upgrade 3: Replace Thermal Paste

Why Old Paste Throttles Performance
Thermal paste replacement addresses a hidden performance killer. Over time, thermal paste between your processor and cooling system dries out and becomes less effective. This causes overheating, which triggers automatic slowdowns to prevent damage.
Laptop overheating fix through paste replacement can restore full processor speeds. You might not realize your laptop has been running slower due to thermal throttling until you experience full performance again.
Paste Selection Guide
Best thermal paste for laptops includes non-conductive options that won't cause damage if accidentally spilled on other components. Arctic MX-4 and Noctua NT-H1 offer excellent thermal performance with safety margins for inexperienced users.
Avoid conductive pastes unless you're very experienced. Spills can short circuit components and destroy your laptop. Stick with proven, non-conductive formulations for peace of mind.
Safe Cleaning and Application
Remove old paste completely using isopropyl alcohol and lint-free cloths. Clean both processor and heatsink surfaces until they're spotless. Apply new paste sparingly - rice grain-sized drops spread into thin layers under pressure.
Reassemble cooling systems carefully. Uneven mounting pressure creates hot spots that reduce cooling effectiveness. Tighten screws gradually in cross patterns rather than fully tightening one screw at a time.
Upgrade 4: Upgrade the Wi-Fi Card

Benefits of Modern Wi-Fi
Wi-Fi card upgrade improvements extend beyond faster internet speeds. Newer cards support Wi-Fi 6 and 6E standards, providing better performance in crowded networks. Many also include updated Bluetooth capabilities for improved device connectivity.
Older laptops with 802.11n cards miss out on modern router capabilities. Upgrading to Wi-Fi 6 compatible Wi-Fi cards unlocks full network potential, especially important for streaming, video calls, and large file transfers.
Compatibility Considerations
Most laptops use M.2 Key A or Key E slots for Wi-Fi cards. However, some manufacturers implement whitelist restrictions that prevent third-party cards from working. Dell and HP are particularly notorious for these limitations.
Research your specific laptop model before purchasing cards. User forums and Reddit communities often have detailed compatibility lists for popular laptop models. This research prevents expensive compatibility mistakes.
Installation Steps
Wi-Fi card installation requires careful antenna handling. These thin cables are fragile and expensive to replace if damaged.
Remove existing cards by gently disconnecting antenna cables and removing mounting screws. New cards install in reverse order, but pay attention to antenna connections. Different colored cables typically connect to specific terminals marked on the card.
Upgrade 5: Battery Replacement

Signs You Need Replacement
Laptop battery replacement becomes necessary when cells degrade beyond useful capacity. Swelling batteries pose safety risks and should be replaced immediately regardless of capacity.
Batteries losing more than 50% capacity within two years indicate premature failure. Windows and macOS include built-in battery health reporting tools that show current capacity compared to original specifications.
Choosing Replacement Batteries
OEM batteries offer guaranteed compatibility but cost more. Certified third-party options from reputable suppliers like iFixit provide good alternatives at lower prices. Avoid extremely cheap batteries from unknown manufacturers - they often fail quickly or pose safety risks.
Check manufacturing dates on batteries. Even unused batteries degrade over time, so avoid old stock sitting in warehouses for years.
Safe Replacement Process
Always disable power and disconnect AC adapters before starting battery work. Many batteries use strong adhesive strips that require patience to remove safely.
Heat guns or hair dryers can soften adhesive, making removal easier. Pull adhesive strips slowly and steadily rather than yanking quickly. Broken strips require careful scraping to remove residue.
Post-Upgrade Optimization
Driver Updates
Hardware upgrades often require driver updates for optimal performance. Snappy Driver Installer provides comprehensive driver scanning and installation for Windows systems. It identifies outdated drivers and provides direct download links.
Manual driver installation from manufacturer websites ensures you get official, tested versions. This approach takes more time but reduces compatibility risks associated with automated tools.
OS Tweaks
Budget laptop upgrade projects benefit from software optimization alongside hardware improvements. Windows debloat scripts remove unnecessary background processes and services that consume resources.
macOS cleanup involves removing login items, clearing caches, and managing startup programs. These tweaks complement hardware upgrades by ensuring your operating system runs efficiently.
When to Call a Pro
Some fixes are beyond typical DIY laptop upgrade skills. Parts like processors or graphics chips are often soldered down permanently. You need special gear and know-how to swap those. Jobs like replacing screens or keyboards get tricky too. They involve fragile ribbon cables and need perfect alignment. Screw this up, and you could damage your laptop badly – repairs might end up costing way more than hiring a pro upfront. Be honest about what you can handle. For tough jobs, getting expert help is the smart move.
Laptop DIY Upgrades FAQ
Can I upgrade RAM on any laptop?
Most laptops support memory upgrades, but watch out: many ultrabooks and cheaper models come with RAM soldered right to the motherboard. That means no swapping it out. Before buying new sticks, dig into your laptop's service manual or run a tool like CPU-Z. It'll show if a DIY Laptop Upgrade is possible for your memory.
How often should I replace thermal paste?
Aim to replace thermal paste every 2-3 years for best cooling. If you game a lot or your system runs hot, doing this yearly might help. Notice louder fans, higher temps, or sudden slowdowns under normal load? That’s your cue it might be time.
Will upgrading void my warranty?
It really depends on who made your laptop. Some companies are fine with you adding RAM or storage; others will cancel your warranty if you even peek inside. Always check your specific warranty terms first. Smart move: keep any original parts you remove, just in case you need to make a claim later.
Can an SSD upgrade fail? Data recovery options?
Installing an SSD usually goes smoothly if you’re careful. But always back up your data first – seriously. If something messes up during cloning, pros can often recover files from the old drive. Just know, that service can cost way more than the upgrade itself.
Is a Wi-Fi 6 card worth it for older routers?
Even with older routers, a new Wi-Fi 6 card works fine. You get better range and a more stable connection right away compared to aging parts. Plus, it’s ready whenever you eventually upgrade your router. Though, if your current Wi-Fi works perfectly, it might not be worth the hassle yet.
How do I test battery health?
-
Windows: Open Command Prompt, type powercfg /batteryreport.
-
Mac: Go to System Information > Power. For deeper details like cycle counts and wear, tools like HWiNFO64 give you the full picture.